
10 Steps in the Ultimate Printer Guide for Troubleshooting Beginners
Meta Description: Printer Guide Troubleshooting Made Easy! 10 steps for beginners on how to troubleshoot common printer problems quickly — no tech skills required. Save time and ink today!
Is Your Printer Acting Up? Here’s What to Do
You hit print. Nothing happens.
Or perhaps the printer makes a weird noise, spits out blank pages, or displays an error you’ve never seen before. Sound familiar?
You’re not alone. Printer issues are the bane of tech users everywhere, in homes and offices globally. The good news? Printer problems aren’t usually difficult to solve — even if you’re not a techie.
In this comprehensive printer guide troubleshooting article, you will find 10 easy-to-follow steps to fix the most common printer issues. No confusing tech language. No expensive repair calls. Just direct, no-nonsense steps that really work.
Let’s see if we can get your printer working again.
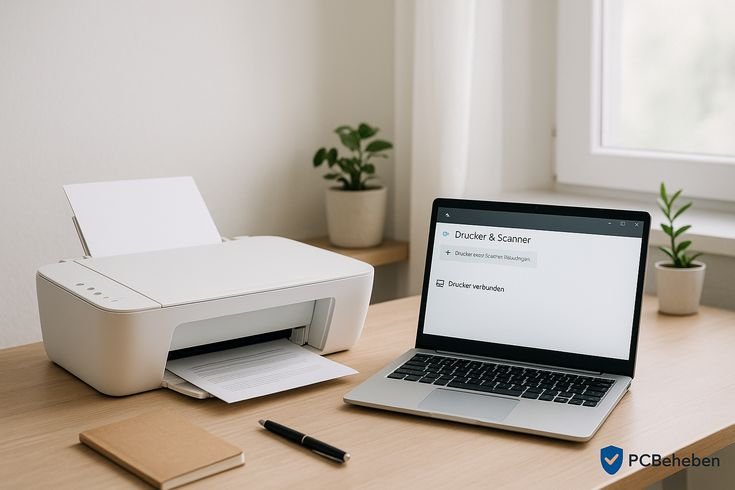
Step 1: Begin With the Basics — Inspect Power and Connections
First, look for the obvious things. You’d be amazed how many printer problems boil down to something dead simple.
Ask yourself these questions:
- Is the printer plugged in?
- Is it turned on?
- Is everything plugged in properly?
- If it’s wireless, is it connected to Wi-Fi?
Disconnect the power cord for 30 seconds and then reconnect it. This simple procedure clears out little snags and resets the printer’s internal memory.
For wireless printers:
Head to your printer’s screen or settings menu and find the Wi-Fi or network setting. Make sure it shows “Connected.” If that fails, reconnect it to your home or office Wi-Fi network.
And ensure your computer or phone and the printer are connected to the same Wi-Fi network. They must be on the same network to communicate with each other.
Quick Connection Checklist
| What to Check | What to Look For |
|---|---|
| Power cord | Fully plugged in, with no loose ends |
| USB cable (if used) | Secure at both the printer and computer |
| Wi-Fi connection | Printer indicates “Connected” status |
| Router | Working properly, internet is live |
| Computer network | Connected on same Wi-Fi as printer |
Step 2: Reboot Everything — Yes, Everything
When in doubt, restart.
This seems too simple, but it often works more than you’d expect. Rebooting removes temporary glitches in the printer and your computer.
Here’s what to restart:
- Completely turn off the printer (not sleep mode)
- Shut down your computer
- Reset your Wi-Fi router (unplug, wait 30 seconds, plug back in)
- Wait a full minute
- First turn your printer back on, then your computer
This three-device reset resolves most small communication glitches between your devices. It’s the quickest remedy on this whole printer guide troubleshooting checklist.

Step 3: Clear the Print Queue — Your Hidden Trouble Spot
Here’s a tip most beginners are unaware of: your computer contains a queue of print jobs waiting to be processed. This is known as the print queue.
If one job is stalled, that blocks everything else behind it. Your printer just sits there, doing nothing — while your computer believes it’s still processing that stalled print job.
How to clear the print queue on Windows:
- Click the Start menu
- Go to Settings → Bluetooth & Devices → Printers & Scanners
- Click on your printer
- Click “Open Print Queue”
- Right-click all the items in the list
- Select “Cancel” for each one
How to clear the print queue on Mac:
- Open System Settings → Printers & Scanners
- Click your printer
- Click “Open Print Queue”
- Click the X next to each job waiting
After clearing the queue, try printing one page again.
Step 4: Check Ink or Toner Levels
One of the primary reasons for poor print quality — or no printing whatsoever — is low ink.
Most printers will display an ink or toner warning on their screen or via software on your computer. Sometimes, though, the warning arrives too late — or never.
Signs you’re running low on ink:
- Pages fading or appear lighter than usual
- Colors look wrong or dull
- Streaks or horizontal lines show on your prints
- The printer says there is a lack of ink
How to check ink levels:
Most printers have accompanying software that you can download on your computer. Search for an app with a name similar to “HP Smart,” “Epson iPrint,” or “Canon PRINT.” Open it and look for an ink or supply section.
Or you can check directly on the printer’s display screen, if it has one.
Ink vs. Toner: What’s the Difference?
| Type | Used In | How It Works | Signs It’s Low |
|---|---|---|---|
| Ink (liquid) | Inkjet printers | Sprays tiny droplets on paper | Faded colors, streaks, blank spots |
| Toner (powder) | Laser printers | Melts powder onto paper | Light prints, smearing, error message |
Change the cartridge once levels dip below 10–15%. Do not wait until it is completely empty — this can damage the print head.
Step 5: Properly Clear Paper Jams
Paper jams are annoying, but with a little know-how they’re also easily fixed. Just stay calm and take it slow. Pulling paper out fast can rip it — and leave bits of it in the machine.
Step-by-step paper jam fix:
- Switch off the printer before taking out paper
- Open all access panels (front, back, and top if you can)
- Look for the jammed paper
- Gently and slowly pull the paper out in the direction it was moving
- Never pull the paper sideways or backward — it can damage internal rollers
- Get rid of all the little bits of ripped paper
- Reassemble the printer and reconnect power
Pro tip: When you clear a jam, print a test page. This tells you the jam is completely cleared and that the rollers are functioning properly.
How to prevent paper jams:
- Never overfill the paper tray
- Always fan the paper before loading it
- Make sure you use the appropriate paper size and thickness for your printer
- Store paper flat in a dry location — warped or moist paper jams easily
Step 6: Update or Reinstall Printer Drivers
A driver is a small program that enables your computer to communicate with your printer. An outdated or broken driver means your printer won’t be working correctly — even if nothing is wrong with the device itself.
That is one of the most common yet underappreciated steps in printer guide troubleshooting, especially for beginners.
How to update your driver on Windows:
- Open Device Manager (right-click the Start button)
- Find “Printers” in the list
- Right-click your printer
- Select “Update Driver”
- Choose “Search automatically for drivers”
How to reinstall a driver:
- Head to your printer brand’s official website (HP, Canon, Epson, Brother, etc.)
- Type in your specific printer model
- Download the latest driver
- Run the installer and follow the steps
Reboot your PC and try to print again after reinstalling.
When to Update vs. Reinstall
| Situation | What to Do |
|---|---|
| Printer stopped working after a Windows update | Update the driver |
| Printer not recognized by computer | Reinstall the driver |
| Prints look different than before | Update the driver |
| Driver software is corrupted | Reinstall the driver |
| Setting up a printer on a new computer | Fresh install the driver |
Step 7: Run the Built-In Printer Troubleshooter
Both Windows and Mac provide built-in tools for finding and fixing printer problems automatically. These are tools that few people have heard of — but they’re very helpful.
On Windows:
- Go to Settings → System → Troubleshoot
- Click “Other Troubleshooters”
- Find “Printer” and click “Run”
- Follow the on-screen instructions
Windows will search for issues and attempt to resolve them automatically. It takes about 1–2 minutes.
On Mac:
Mac doesn’t have a specific printer troubleshooter, but you can reset the printing system:
- Open System Settings → Printers & Scanners
- Right-click (or Control + click) in the printer list
- Select “Reset printing system”
- Confirm and re-add your printer
Warning: Resetting the printing system on Mac deletes all printers. You have to re-add yours. But this usually resolves underlying software problems.
Step 8: Verify Printer Settings and Default Printer Selection
Sometimes, the main issue is not with the printer at all — your computer is simply sending the job to the wrong printer.
This occurs when you have more than one printer configured (like a home printer and work printer, or an old and new one). Your computer could be routing the job to a printer that’s turned off or not connected.
How to set a default printer on Windows:
- Go to Settings → Bluetooth & Devices → Printers & Scanners
- Scroll down and turn off “Let Windows manage my default printer”
- Select the printer you wish to print from
- Select “Set as default”
How to set a default printer on Mac:
- Go to System Settings → Printers & Scanners
- Scroll to the bottom for “Default Printer”
- Select your printer from the menu
Also confirm these settings before printing:
- Paper size: Is this set to Letter, A4, or whatever paper you have?
- Print quality: Is it accidentally in “draft” mode?
- Color vs. black and white: Are you attempting to print in color but have it set to black only?
Step 9: Troubleshoot Poor Print Quality
Your printer is operating but your output looks awful. This is one of the most frequent complaints — and one of the simplest to resolve.
Streaky or Faded Prints
Cause: Clogged print heads or low ink Fix: Use the print head cleaning tool in your printer software. On the vast majority of printers: printer software → Maintenance → Clean Print Heads.
Blurry or Smeared Text
Cause: Wrong paper type, wet paper, or ink not drying fast enough Fix: Use the recommended paper for your printer. Try printing with a slower, higher-quality setting.
Wrong Colors
Cause: An ink cartridge is running low or colors are misaligned Fix: Check each cartridge separately. Also, check print settings and confirm that you have selected “Color” printing.
White Lines Running Through the Page
Cause: Clogged nozzles in the print head Fix: Perform 2–3 print head cleaning cycles. Then print a nozzle check pattern (found in printer maintenance settings) to see if the lines have disappeared.
Print Quality Comparison Table
| Problem | Most Likely Cause | Quick Fix |
|---|---|---|
| Faded prints | Low ink/toner | Replace cartridge |
| Horizontal streaks | Clogged print head | Run head cleaning tool |
| Smeared ink | Wrong paper or wet paper | Use correct paper type |
| Wrong colors | Empty color cartridge | Check and replace cartridges |
| Blurry text | Low print resolution | Increase quality in settings |
Step 10: As a Last Resort — Reset and Reach Out for Help
You’ve tried everything. Still not working. Don’t panic — there’s one more move.
Factory reset your printer.
It restores all of the custom settings you’ve made and resets it to as shipped from the factory. It corrects software bugs that nothing else can touch.
How to perform a factory reset on most printers:
- Navigate to Settings → Restore Defaults or Setup → Reset on the printer’s display
- For HP printers: Press and hold the Cancel and Wireless buttons for 3 seconds
- For Epson printers: Go to Setup → Restore Default Settings
- For Canon printers: Press and hold the Stop button for 5 seconds
Consult your printer’s manual or the manufacturer’s website for precise steps.
After the reset:
You will also need to reconnect to Wi-Fi and reinstall the printer on your computer. Complete the same initial setup steps that came with your printer.
Still not fixed? Contact support:
- HP Support: support.hp.com
- Epson Support: epson.com/support
- Canon Support: usa.canon.com/support
- Brother Support: support.brother.com
All brands provide free chat or telephone support. Get your printer model number handy — it’s typically found on a sticker located on the bottom or back of the printer.
For even more detailed help with specific printer models and error codes, visit Printer Troubleshoot Guide — a dedicated resource packed with step-by-step fixes for all major printer brands.
Bonus Tips: How to Maintain Your Printer
Prevention is better than cure. Here are some great habits that will help your printer stay healthy for a long time:
- Print at least once per week. Printers that aren’t used for extended periods develop clogged print heads.
- Keep the printer clean. Wipe dust off the outside. Inside, use a dry cloth — no water near electronics.
- Store paper properly. Store paper in a cool, dry environment. Humidity makes paper bow and jam.
- Use genuine cartridges. Third-party or refilled cartridges can cause quality problems or damage.
- Update printer firmware. Firmware is internal software similar to a driver. Every few months, visit the manufacturer’s website and look for updates. You can learn more about firmware and driver management from HP’s official printer support page.
FAQs: Printer Guide Troubleshooting
Q1: Why is my printer showing online but not printing? The print queue may be stuck. Remove any pending queued jobs on your computer. Next, turn the printer off and back on again, and test with a single page.
Q2: How do I check if my printer driver is outdated? On Windows, go to Device Manager, right-click your printer and choose “Properties.” The driver date will show up under the driver tab. If it’s older than a year, consider an update.
Q3: Why does my wireless printer keep going offline? This typically means the printer disconnected from Wi-Fi. Ensure your router is functioning, reconnect the printer to Wi-Fi, and check that your computer is on the same network.
Q4: Can I fix a paper jam without turning the printer off? The safest bet is to turn it off first. It also avoids paper tearing or injury by allowing the rollers to stop rotating for easier paper removal.
Q5: Why do I have lines through my prints? That is nearly always a blocked print head. Run the head cleaning cycle from your printer software 2–3 times. Print a test page after every cycle to check how things are looking.
Q6: How often should I replace ink cartridges? It may vary based on your usage. A typical cartridge prints about 200–400 pages. Regularly check ink levels and replace them when they fall below 10–15%.
Q7: Can I use third-party ink cartridges? They are effective most of the time, but they may introduce quality problems or void your warranty. For optimal results, use the brand’s own cartridges when available.
Q8: My printer says “Error” but everything seems fine. What do I do? Try restarting the printer — power it off and on. Clear the print queue. If the error persists, note down the error code (if provided) and look it up on the manufacturer’s support site.
Wrapping It All Up
Printer problems don’t have to ruin your day.
Most problems — blank pages, paper jams, Wi-Fi disconnections, and more — can be resolved in just a few minutes by going through the steps in this printer guide troubleshooting article. You don’t need to be a tech expert. You just have to know where to look and what to do first.
Here’s a rundown of all 10 steps:
- Check power and connections
- Reboot your printer, PC, and router
- Clear the print queue
- Check ink or toner levels
- Fix paper jams carefully
- Update or reinstall printer drivers
- Run the built-in troubleshooter
- Check your default printer and settings
- Fix print quality issues with head cleaning
- If nothing works, do a factory reset
Begin at Step 1 and go down the list. For most people, they discover the fix long before they even get to Step 5.
Bookmark this page so you’ll have it handy next time your printer decides to act up.