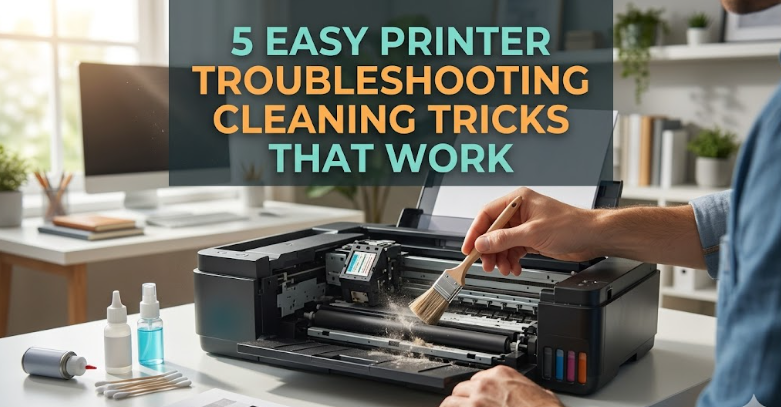
5 easy printer troubleshooting cleaning tricks that work
Printers have a strange way of failing at the worst possible moment. You only notice them when something goes wrong—smudged pages, streaky prints, faded text, or that dreaded “paper jam” message that refuses to go away. What many people don’t realize is that most of these issues don’t require a technician or expensive replacement parts. In fact, a large portion of printer problems can be traced back to something surprisingly simple: dirt, dust, dried ink, or neglect.
Cleaning a printer isn’t glamorous, but it’s one of the most effective ways to extend its life and improve performance. If done properly and regularly, a few simple habits can prevent common breakdowns and save both time and money. The following five tricks aren’t complicated, and they don’t require advanced tools. They are practical, realistic, and proven to work when applied consistently.
understanding why cleaning matters more than you think
Before jumping into the tricks themselves, it helps to understand what’s happening inside a printer. Whether you’re using an inkjet or a laser printer, both rely on precise mechanical movements and delicate components. Inkjet printers spray tiny droplets of ink through microscopic nozzles, while laser printers use toner powder and heat to fuse images onto paper.
Dust particles, dried ink, and leftover toner can interfere with these processes. When ink dries inside nozzles, it blocks the flow. When dust settles on rollers, paper stops feeding smoothly. Over time, even small amounts of buildup can cause visible defects in print quality.
Think of a printer like a car engine. It may keep running for a while without maintenance, but eventually, neglect catches up. Cleaning isn’t just about fixing problems—it’s about preventing them from happening in the first place.
trick 1: clean the print head to restore sharp printing
One of the most common issues people face is faded or streaky printing. You might notice missing lines in text or uneven color distribution in images. This is often caused by clogged print heads.
In inkjet printers, the print head is where the ink exits onto the paper. Because the openings are so small, they can easily become blocked by dried ink, especially if the printer hasn’t been used for a while.
Most printers come with a built-in cleaning function. It’s usually found in the printer settings menu under maintenance or tools. Running this function forces ink through the nozzles to clear minor clogs. However, if the problem persists, manual cleaning may be necessary.
To clean the print head manually, turn off the printer and remove the ink cartridges. Use a lint-free cloth slightly dampened with warm distilled water. Gently dab the print head area—never scrub aggressively. The goal is to soften and remove dried ink, not damage the component.
Let it dry completely before reinstalling the cartridges. Afterward, run a test print. In many cases, this simple process restores clarity almost instantly.
A useful habit is to print something at least once a week. This keeps the ink flowing and prevents it from drying inside the nozzles.
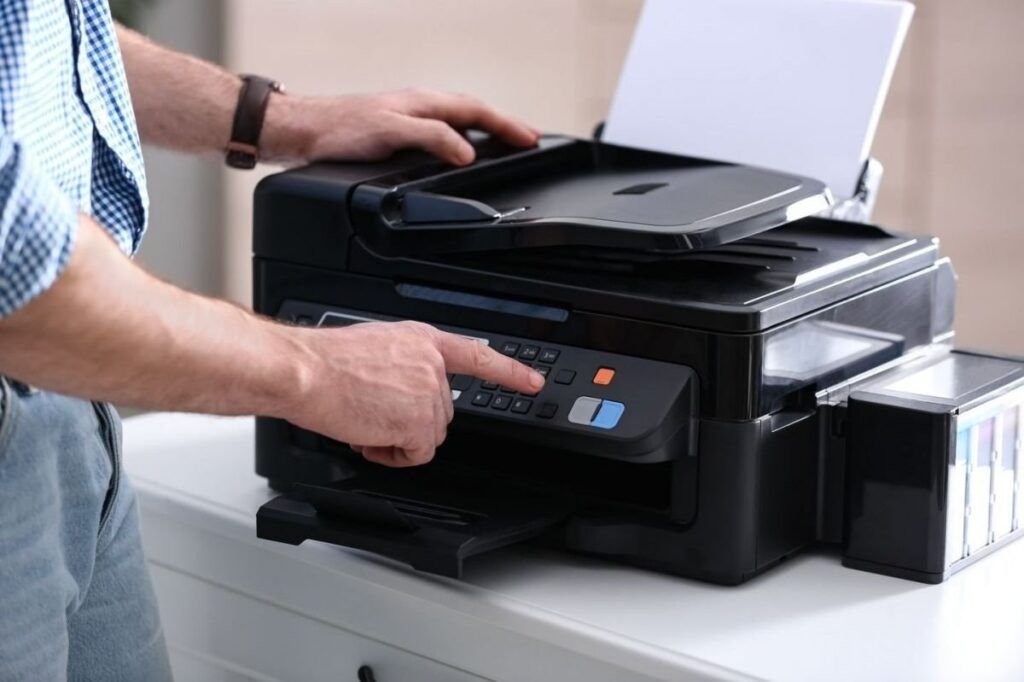
trick 2: wipe the rollers to fix paper jams and feeding issues
Paper jams are frustrating, especially when they happen repeatedly. While people often blame the paper itself, the real issue is frequently the rollers inside the printer.
These rollers are responsible for gripping and feeding paper through the machine. Over time, they collect dust, paper fibers, and even oils from handling. This buildup reduces their grip, causing misfeeds or jams.
Cleaning the rollers is easier than it sounds. Start by unplugging the printer for safety. Open the access panel and locate the rubber rollers. Rotate them manually if possible.
Using a soft cloth dampened with water or isopropyl alcohol, gently wipe the surface of the rollers. Rotate them as you clean to cover the entire circumference. Avoid soaking them—too much moisture can damage internal parts.
Once cleaned, allow them to dry before turning the printer back on. The difference can be noticeable immediately. Paper feeds more smoothly, and jams become far less frequent.
It’s also worth checking the type and condition of the paper you’re using. Damp or low-quality paper can contribute to feeding issues, even if the rollers are clean.
trick 3: remove dust from the interior for consistent performance
Dust is an invisible enemy when it comes to printers. It settles inside the machine, clings to components, and interferes with movement. Over time, it can lead to overheating, noise, and reduced print quality.
Opening the printer occasionally for a gentle cleaning can make a big difference. You don’t need specialized tools—just a can of compressed air and a soft brush.
Start by turning off and unplugging the printer. Open all accessible panels and inspect the interior. Use compressed air to blow out dust from hard-to-reach areas. Hold the can upright and use short bursts to avoid moisture buildup.
For surfaces that need more attention, use a soft brush to loosen dust before blowing it away. Avoid touching sensitive components directly with your fingers.
Laser printers require extra care because of the toner powder inside. Toner is very fine and can spread easily. If you notice loose toner, clean it gently without creating clouds of dust.
Regular dust removal not only improves performance but also helps maintain quieter operation. Printers that are kept clean tend to run smoother and last longer.
trick 4: clean the exterior and paper path for better output quality
While internal cleaning is important, the exterior and paper path shouldn’t be ignored. Dirt on the outside can easily find its way inside, especially through the paper tray.
Start with the outer surfaces. Use a microfiber cloth to wipe away dust and fingerprints. This may seem cosmetic, but it prevents debris from being transferred into the machine.
Next, focus on the paper path. Remove any loose sheets and check for scraps of paper stuck inside. Even small pieces can cause alignment issues or jams.
If your printer allows it, gently clean the paper tray and guides. Dust and debris in this area can affect how paper is fed into the printer.
Keeping the environment around the printer clean also matters. Placing it in a dusty corner or near an open window increases the chances of contamination. A simple change in location can reduce cleaning frequency significantly.
trick 5: maintain ink and toner areas to prevent leaks and smudges
Ink cartridges and toner units are essential parts of any printer, and they can become sources of problems if not handled properly. Leaks, smudges, and inconsistent printing often originate from these areas.
When replacing cartridges, take a moment to inspect the compartment. Look for dried ink, spilled toner, or debris. Use a soft cloth to clean the area gently.
Avoid touching the electrical contacts or the print head directly with your fingers. Oils from your skin can interfere with performance.
If you notice ink buildup around the cartridge nozzles, clean it carefully using a damp cloth. For toner printers, ensure that the toner cartridge is seated correctly and that there’s no loose powder inside.
Proper storage of cartridges also plays a role. Keep them sealed until use and store them in a cool, dry place. Exposure to heat or air can degrade their quality.
Regular attention to these components helps maintain consistent print quality and reduces the risk of sudden issues.
small habits that make a big difference
Cleaning doesn’t have to be a major task done once in a while. Small, regular habits are far more effective. Printing a test page weekly, wiping surfaces occasionally, and checking for dust can prevent most problems before they start.
It’s also helpful to pay attention to early warning signs. Unusual noises, slight streaks, or occasional jams are often signals that cleaning is needed. Addressing them early can prevent bigger issues later.
Think of maintenance as part of using the printer, not something separate. Just as you wouldn’t ignore a flickering light in your home, you shouldn’t ignore small changes in printer behavior.
a quick checklist for routine cleaning
- run the built-in print head cleaning function once a month
- wipe rollers every few weeks if the printer is used frequently
- remove dust from the interior every one to two months
- clean the exterior and paper tray regularly
- inspect cartridges during every replacement
Following a simple checklist like this keeps everything running smoothly without requiring much effort.
common mistakes to avoid during cleaning
Even with good intentions, it’s possible to cause more harm than good if cleaning is done incorrectly. One common mistake is using too much liquid. Printers contain electronic components that can be damaged by moisture.
Another mistake is using rough materials like paper towels, which can leave fibers behind. Always use lint-free cloths.
Avoid using household cleaners unless they are specifically safe for electronics. Harsh chemicals can damage plastic and internal parts.
Finally, never force any component to move. If something doesn’t open easily, check the manual instead of applying pressure.
faq section
what is the safest way to clean a printer without damaging it
The safest approach is to unplug the printer and use lint-free cloths, minimal moisture, and gentle movements. Avoid harsh chemicals and never apply excessive force. Stick to water or isopropyl alcohol for cleaning.
how often should i clean my printer
It depends on usage, but a light cleaning every few weeks and a deeper cleaning every couple of months is generally sufficient. High-use environments may require more frequent maintenance.
can cleaning fix poor print quality completely
In many cases, yes. Issues like streaks, fading, and smudges are often caused by dirt or clogs. However, if cleaning doesn’t help, there may be worn-out components that need replacement.
is it necessary to use professional cleaning kits
Not always. Basic cleaning can be done with simple tools like cloths, water, and compressed air. Professional kits can be helpful but aren’t essential for routine maintenance.
why does my printer still jam after cleaning the rollers
If jams persist, the problem could be worn rollers, poor-quality paper, or internal alignment issues. Cleaning helps, but it’s not a solution for every mechanical problem.
can i clean a printer while it is turned on
No, it’s best to turn off and unplug the printer before cleaning. This reduces the risk of electrical damage and ensures safety.
final thoughts
Printers don’t demand much, but they do require a bit of attention. Ignoring them until something goes wrong often leads to frustration and unnecessary expense. On the other hand, a few simple cleaning habits can keep them running smoothly for years.
These five tricks aren’t complicated or time-consuming. They’re practical steps that anyone can follow, regardless of technical skill. By understanding how your printer works and taking a proactive approach to maintenance, you can avoid most common issues and enjoy reliable performance whenever you need it.
In the end, it’s not about fixing problems—it’s about preventing them. And that starts with keeping things clean.